
You might have heard of Bluemix, IBM’s Platform-as-a-Service (PaaS), in the ongoing cloud battle. It’s one of the competitors of Google App Engine (GAE) and AWS Elastic Beanstalk and RedHat OpenShift.
Recently IBM launched their Containers service (beta) based on Docker. This service allows you to run your Docker images on Bluemix. I was excited to read this news since I’ve been wanting to play around with Bluemix and also I’ve recently Dockerized a Spring Boot application which I want to get up and running in the cloud.
Getting started
Before you can get started there are few things you need have installed.
- Docker
- Python, pip and Setuptools
Step 1: Register an account
Go to the Bluemix website and register for a free 30 day trial account. After these 30 days you are required to add a credit card to your account to continue, but every month you get 375 free GB-hours and most services have a free tier.
This step is done after you named your Organization and created a Space where you can add applications and services.
Step 2: Add Container Services
Go to the catalog, you’ll be suprised with the amount of services you have at your disposal to hit the ground running with your application. Today we will only be focussing on the Containers (Experimental) service under the Integration sub section.
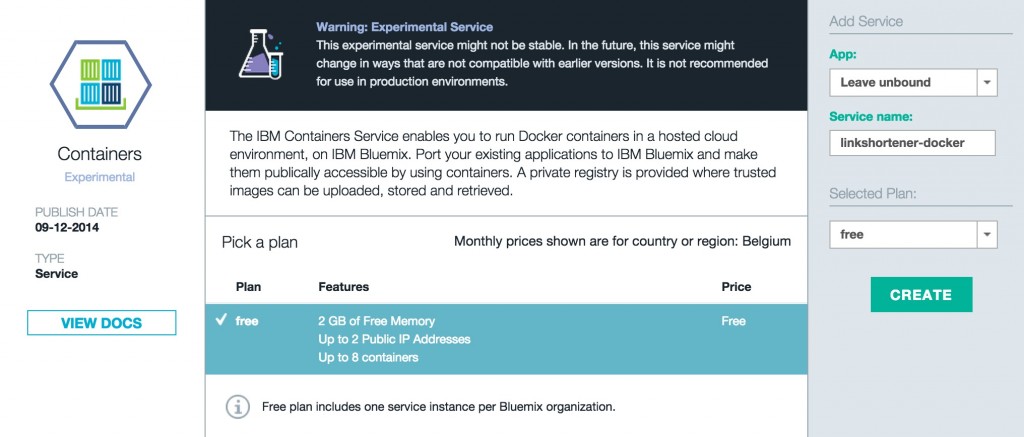
Here you get to choose a registry namespace, which will be the name for your private repository that will host your Docker images. You’ll also get an API key which you will need in a minute to authenticate with the Container service.
Apparently since the demand for this beta service is currently very high, you might get a notice that you have to wait until your request gets approved. I noticed that this page doesn’t update correctly, due to caching issues probably, so it’s best to make sure you restart your browser or clear your cache before checking again.
Step 3: Install the command line tools
To manage and start your containers you’ll be working with ICE, a command line tool. Download and extract the [icecli]https://www.ng.bluemix.net/docs/containers/container_cli_ov.html).
Now use pip to install the icecli-1.0, this might require root privileges:
pip install icecli-1.0.zip
Step 4: Manage your images
If you got this far, it’s time to finally interact with the Container service using the command line tools you’ve just installed. Open up a terminal and login to the Bluemix service with your API key that was generated by the Bluemix console in step 2. This can be done by executing the following command:
ice login -k <API_KEY>Currently there are two images out-of-the-box in your private Docker registry:
If you are using one of there technologies and you don’t have a Docker image yet, it might be a good idea to play around with these images. These images run a SSH server by default, enabled by supervisord.
I didn’t want to tie myself to one of their images, so I decided to proceed with my own image created in my previous Docker introduction blog post. I changed the underlying Docker images to my own lightweight images: drissamri/base and drissamri/java:jre8. This JRE image is only 140,3MB, which is very small compared to the previous one that was over 700 MB. For now the JRE is sufficient for my Spring Boot application it is all I need, and the application server is embedded by Spring boot. When I ever need to build an image that actually needs a JDK instead of a JRE alone, then I’ll create a new tag on my Docker repository.
Now go to the folder where your Dockerfile is located, here you can find my simple Dockerfile: [gist https://gist.github.com/drissamri/bd2066234b44acc2900b]
It is important to note that support told me that Bluemix Container service currently is only able to expose the following ports: 22, 80, 443, 9080 or 9443. I tried exposing a service on port 80 but it did not work for me, so I switched over to 9080 which worked. You need to expose the desired port in your Dockerfile since there currently is no command line way to specify it when starting a container.
If you don’t have a Docker image yet locally, make sure you build it. I have build it the following name: drissamri/linkshortener
docker build -t drissamri/linkshortener .Next we’ll tag this image and send it to our private Bluemix Container repository.
ice --local tag drissamri/linkshortener registry-ice.ng.Bluemix.net/driss/linkshortener
ice --local push registry-ice.ng.Bluemix.net/driss/linkshortener
Now you can run ice images to see if your image was added to the list, next to the Liberty and Node images.
Let’s start up a container with name linkshortener based on our image at registry-ice.ng.Bluemix.net/driss/linkshortener
ice run --name linkshortener registry-ice.ng.Bluemix.net/driss/linkshortenerWhen thats done you can check its status by running ice ps. Now we want to make sure we can access this image over the internet, so we’ll assign a public IP. You can request free floating IPs for container service by executing ice ip request and then binding one of the returned IP addresses to your container with ice ip bind IP CONTAINER
ice ip bind 129.41.248.102 linkshortener
At this point, give the container a bit of time to fully initialize, but the service should be up and running shortly. My service is accessible on http://129.41.248.102:9080/links. If you got this far, you successfully deployed your Docker on Bluemix!
You might have noticed that the ice commands are just a wrapper around the Docker command line interface and most functionality is available. If you run into problems just append the –help` parameter to your command or check out the documentation.
Remarks
A few bumps along the way, if you are accessing the Bluemix website and thing doesn’t seem to work like they should try to refresh your browser cache. I noticed this while accessing the IBM Containers service page while waiting for approval, but when I refresh the page I was able to go passed that page. Also when checking your images and containers, most of the time it showed no entries unless I accessed the page without caching (I just opened Chrome dev tools, so caching is disabled).
You can’t expose the ports during start up of the container, there is no -p or -P parameter like you have on the Docker CLI. Expose your ports in the Dockerfile. Support told me that ports 22, 80, 443, 9080 or 9443 are available to use, but I wasn’t able to access my service on port 80 so I went for 9080.
If you have any questions, tips or tricks please let me know here or on Twitter!