As you might know, this site is created as a static website with Jekyll.
GitHub Pages in combination with Jekyll is a simple yet powerful tool to build and serve static websites.
However, by default you website will be located at username.github.io, e.g., http://drissamri.github.io for this page. Generously, GitHub provides means to add a custom domain to your GitHub Page.
There are a few limitations, but for me the only limitation that was bothering me that there is currently no support for SSL on custom domains. You can partly work around this problem by using a service like CloudFlare, although it won’t give end-to-end SSL it is definitely better than using no SSL.
Since I like Bluemix, IBM’s Platform-as-a-Service based on the open source Cloud Foundry, I decided to give it a shot to deploy my website and setup SSL on it. If you haven’t tried it yet, definitely do! You can get a 30-day free trial, and afterwards you can still use the free tier. The free tier is plenty to host a few applications. Since Bluemix uses Cloud Foundry, I will mix both terms throughout this post.
Deploy your application on Bluemix
I prefer to work with the Cloud Foundry CLI instead of the Bluemix website, but both ways work. If you’re scared of a terminal, feel free to use the website.
The most important artifact for a Cloud Foundry application is the manifest.yml which defines metadata about your application. You can find the full manifest here.
---
applications:
- name: drissamri-blog
  memory: 64M
  host: drissamri-prd
  path: _site/
  buildpack: https://github.com/cloudfoundry/staticfile-buildpack.git
stack: cflinuxfs2name: Name of your application.
memory: Specify how much memory your application needs.
host: This defines the name for the subdomain (yourhost.mybluemix.net).
path: Specify what folder gets pushed. If not defined, defaults to the current directory.
buildpack: Specify what kind of buildpack your application needs.
stack: Bluemix currently defaults to an older stack (lucid64) so you better specify this if you are using a recent buildpack. More information here: Cloud Foundry stacks
Once you saved this file, you can use the Cloud Foundry CLI to push the application. Make sure you your Cloud Foundry CLI is pointing to the desired region (EU or US). Go ahead and get your baby in Bluemix with cf push.
cf push

Using stack cflinuxfs2...
OK
Updating app drissamri.com in org drissamri / space prod as driss.amri@optis.be...
OK

Using route drissamri-prd.drissamri.com
Uploading drissamri.com...
Uploading app files from: /Users/driss/workspace/drissamri/drissamri.github.io/_site
Uploading 626.3K, 76 files
Done uploading
OK

Starting app drissamri.com in org drissamri / space prod as driss.amri@optis.be...
-----> Downloaded app package (1.3M)
Cloning into '/tmp/buildpacks/staticfile-buildpack'...
Submodule 'compile-extensions' (https://github.com/cloudfoundry-incubator/compile-extensions.git) registered for path 'compile-extensions'
Cloning into 'compile-extensions'...
Submodule path 'compile-extensions': checked out 'ce9345a9a6e7b00266194cadd18dbef37e791a7b'
-------> Buildpack version 1.2.1
grep: Staticfile: No such file or directory
-----> Using root folder
-----> Copying project files into public/
-----> Setting up nginx
grep: Staticfile: No such file or directory
-----> Uploading droplet (4.8M)

1 of 1 instances running

App started


OK

App drissamri.com was started using this command `sh boot.sh`

Showing health and status for app drissamri.com in org drissamri / space prod as driss.amri@optis.be...
OK

requested state: started
instances: 1/1
usage: 64M x 1 instances
urls: drissamri-prd.drissamri.com
last uploaded: Wed Sep 2 20:34:35 UTC 2015
stack: cflinuxfs2

     state     since                    cpu    memory        disk          details
#0   running   2015-09-02 10:35:08 PM   0.0%   4.1M of 64M   10.6M of 1G
Now your application should be available on https://YOURHOST.mybluemix.net.
Setup your custom domain in Bluemix
I want my site to be available on drissamri.com and www.drissamri.com. There’s a few easy steps to do to accomplish this. If you are OK with using the default Bluemix URL of your application or you don’t have a custom domain, you can skip these steps.
First you will have to define your domain in Bluemix. Create the domain in Bluemix and associate it with an organization, in my case it’s called drissamri.
cf create-domain drissamri drissamri.com
cf create-domain drissamri www.drissamri.com
Now your domain is known within your organization, next you’ll want to map this domain to your application. Both my domain name and application name are called… drissamri.com.
cf map-route drissamri.com drissamri.com
cf map-route drissamri.com www.drissamri.com
Enable SSL
One of the reasons of moving my blog was to be able to enable and force SSL on my site. I already have a SSL certificate for my website, if you need one I can recommend SSLMate. By the time you are reading this, it might be worth checking out letsencrypt.org if they are already issueing certificates.
Unfortunately as far as I know, you can’t manage certificates with the Cloud Foundry CLI, so you’ll have to switch over to the Bluemix website. Navigate to the Manage Organizations and go to the Domains tab. Here you should see your newly created domain.
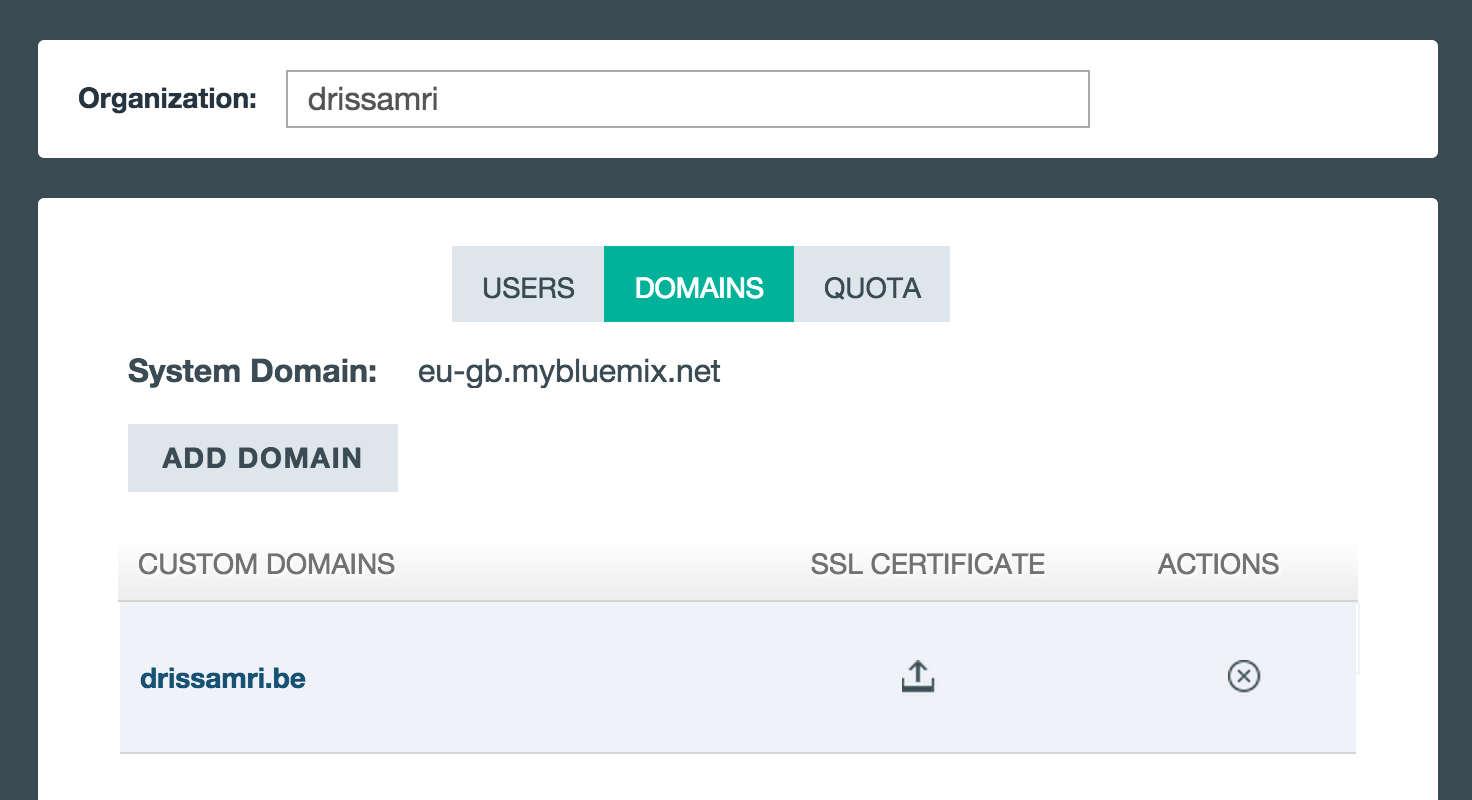
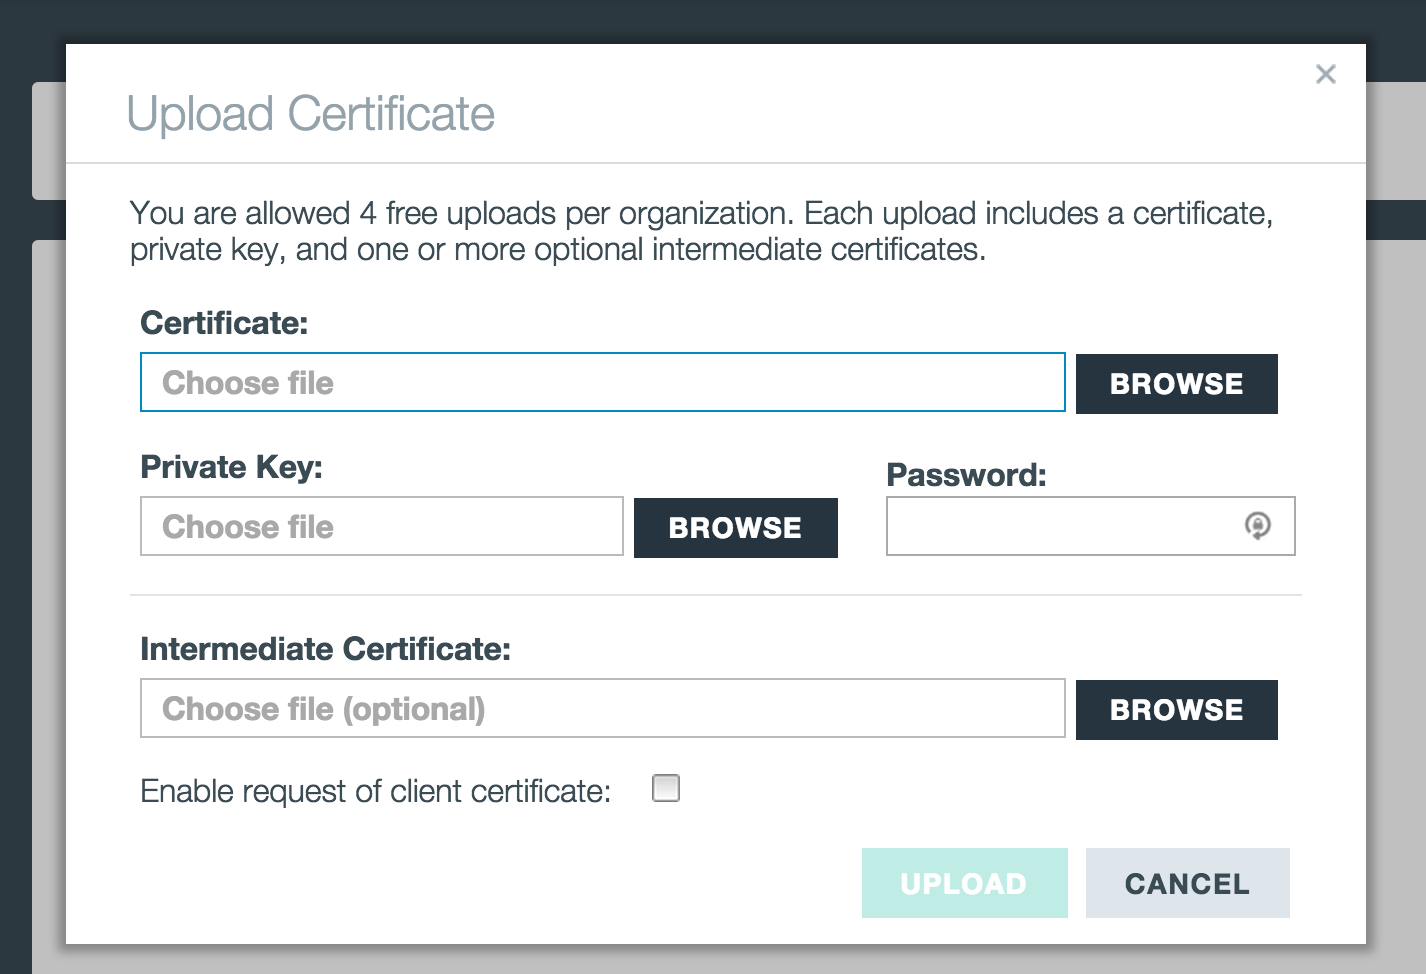
Perfect. Now you can upload the SSL certificate for this domain by clicking on the upload icon. Here you have to upload your private and public certifcates, and possibly an intermediate certificate.

Now Bluemix knows about your domain and your certificate, but the actual forwarding from your domain to the Bluemix application still has to happen. This has to be done on your domain DNS manager. My domain is registered at GoDaddy but I’m using the free CloudFlare plan for security and caching features. Your A record should point to the Bluemix DNS server, the server IP depends on which region you are using for your application. For me currently in the EU I have to use 5.10.124.142 but you should verify in the documentation for up-to-date information.

One last thing, if you want to force SSL usage of your site on HTTPS, you have to add another property to your manifest.yml. This is a feature of the staticfile-buildpack that we defined for our application.
env:
  FORCE_HTTPS: true
That’s about it! Up and running on Bluemix with a custom domain in a few minutes. It’s been running pretty smooth so far.
Are you interested in learning more about Cloud Foundry and Bluemix? Have questions or problems? Feel free to drop in the unofficial Bluemix Devs Slack channel to come chat with other developers! You can join HERE